Quick jump |
|
|
|
The Miscellaneous settings screen allows setting Project, Table specific, and Enterprise Edition settings.
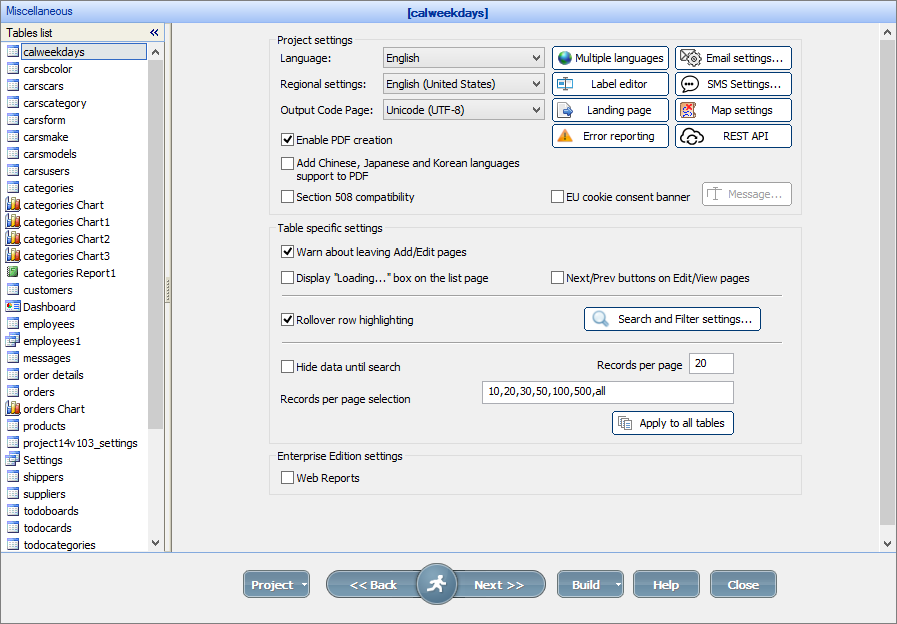
The Project settings block includes settings that affect the entire project.
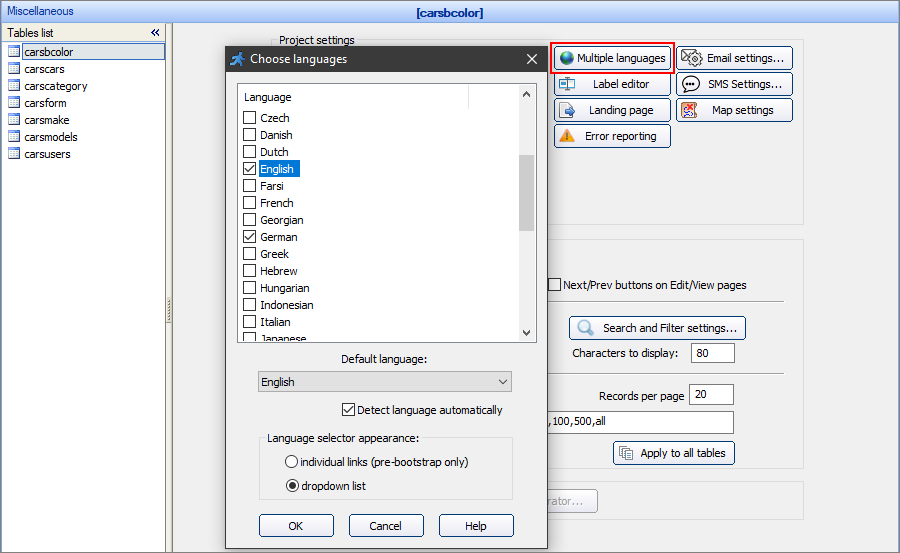
Use the Language dropdown box to set the project language. By clicking the Multiple languages button, you can select several project languages and give users the ability to select the language when logging in. The translation of standard buttons and elements is already included in the ASPRunner.NET, so you don't need to translate them yourself.
This is how the dropdown list option looks like in the generated project.

Choose the country from the dropdown box to select its regional settings. These settings affect the year-month-day order, the first day of the week, etc.
This dropdown allows selecting the character encoding for the project.
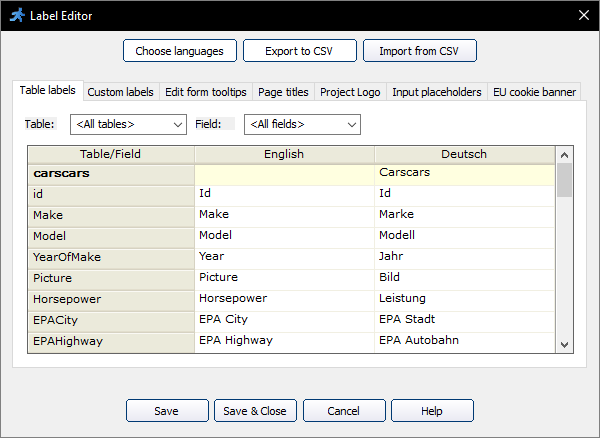
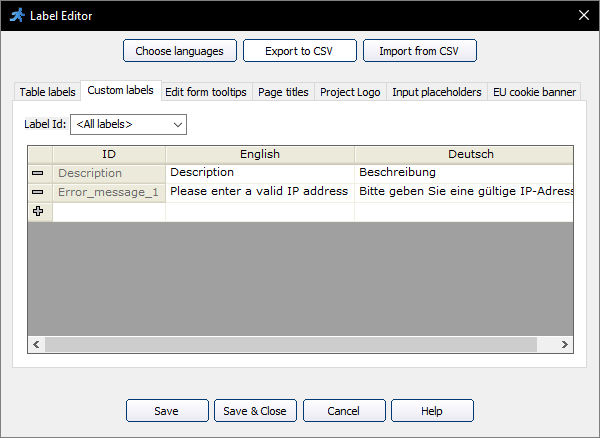
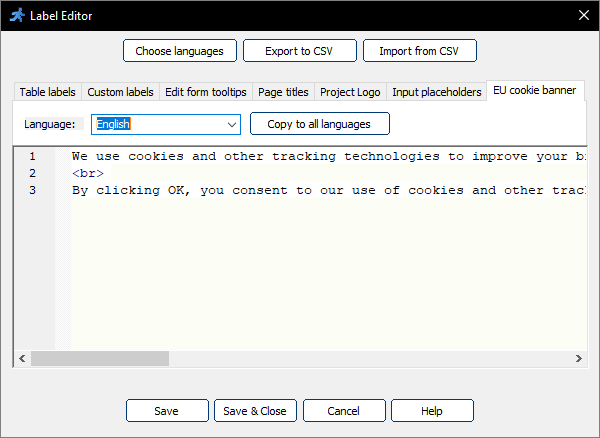
Label Editor allows you to:
•edit table and field labels (Table labels tab);
•edit custom labels (Custom labels tab);
•add tooltips to the Edit forms (Edit form tooltips tab);
•edit web page titles (Page titles tab);
•edit the project logo (Project Logo tab);
•setting the placeholders for the fields (Input placeholders tab);
•editing the EU cookie consent banner text (EU cookie banner tab).
You can translate labels into several languages. Click Choose languages to add more languages to the project.
You can export multilanguage labels to a CSV file (use the Export to CSV button), then edit the labels in the external editor and import the file back (use Import from CSV button).
Note: if you use languages other than English in the project, we recommend editing the CSV files using Google Docs or OpenOffice.
Due to the problems with the character encoding, we do not recommend using Microsoft Excel for projects with multiple languages.
Modify and translate the table and field labels to make them more user-friendly. Filter the labels by table or field to limit the data displayed. Use <br> to insert a line break in the field label.
Use the Custom labels to translate error messages in regular expressions and custom validation plugins. You can also create custom labels to display messages to a user. Filter the labels by the Label Id to limit the data displayed.
If you have created Custom labels and want to place the language-dependent text on a page, you can add a C#/VB.NET code snippet to the page and use the following code in it:
MVCFunctions.Echo(CommonFunctions.GetCustomLabel("CustomLabelID"));
Replace "CustomLabelID" with the correct custom label identifier.
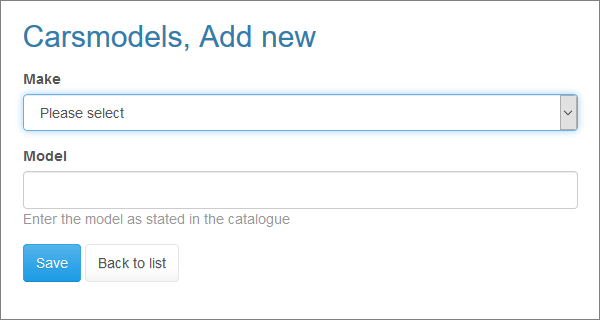
Add a tooltip to a field to display additional information about it on the Add/Edit page, or during inline editing on the List page. To create a multiline tooltip, use <br> as a line separator.
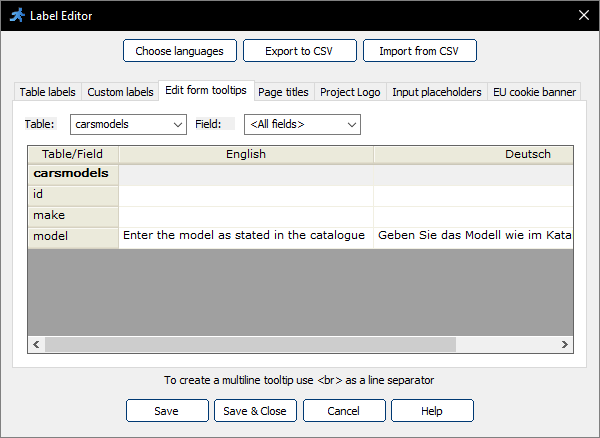
Here is how it looks in the browser:
To edit a web page title, deselect the Default checkbox next to it and make the changes. Filter the page titles by the table or page to limit the data displayed.
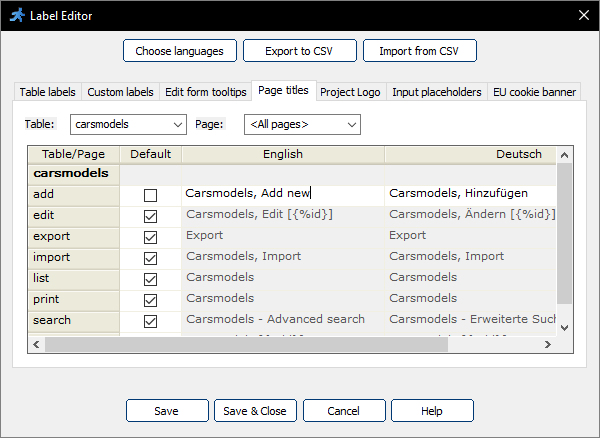
While editing the page title, you can use the field values, e.g. {%ID} and {%Make} for View and Edit pages. For example:
Cars, Edit record [ID:{%ID}]
Customers, {%FirstName} {%LastName}
You can also use the field values of the master table on the List page of the details table. Here is the example of a page title for the Order details table:
Orders, ID: {%master.OrderID}
Change the project logo with the Project logo tab. You can enter plain text or HTML code here.
Here is an example of the code that can be used to display a logo icon and text:
<DIV>
<IMG id="navbarlogo" alt="Project logo" src="https://mywebsite.com/images/logo.png">
Cars Project
</DIV>
That's how it looks like on the generated page:
You can do even more by using the Labels/Titles API function setProjectLogo. You may, for example, add the logo image and the current year to the project logo.
Put the logo.png into the images folder of your application, and add the following code to AfterAppInit event:
Labels.setProjectLogo("<DIV style='position: relative; height: 40px; top: -6px; white-space: nowrap;'><IMG height='80%' id='navbarlogo' alt='Project logo' src='http://mywebsite.com/images/logo.png'> Cars project - "+DateTime.Now.Year.ToString()+"</DIV>");
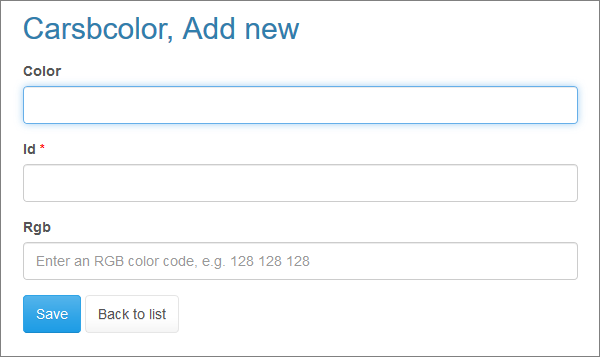
The placeholder specifies a short hint that describes the expected value of an input field (e.g., a sample value or a short description of the expected format). Placeholders are displayed in the input field before the user enters a value.
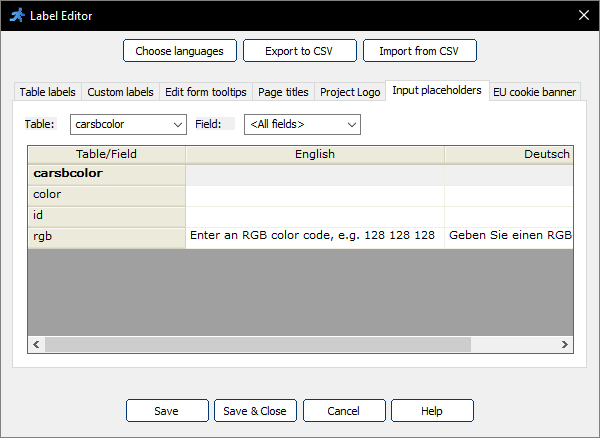
Here is how it looks like in the browser:
Check this Live Demo for more information.
This tab sets the text for the EU cookie consent banner option. You can use <br> as a line separator.
With Email settings, you can enter the email from which to send emails to the users, and define the settings of the custom mail server, if you do not use the built-in mail server. The Two-factor authentication must be turned off to send emails.
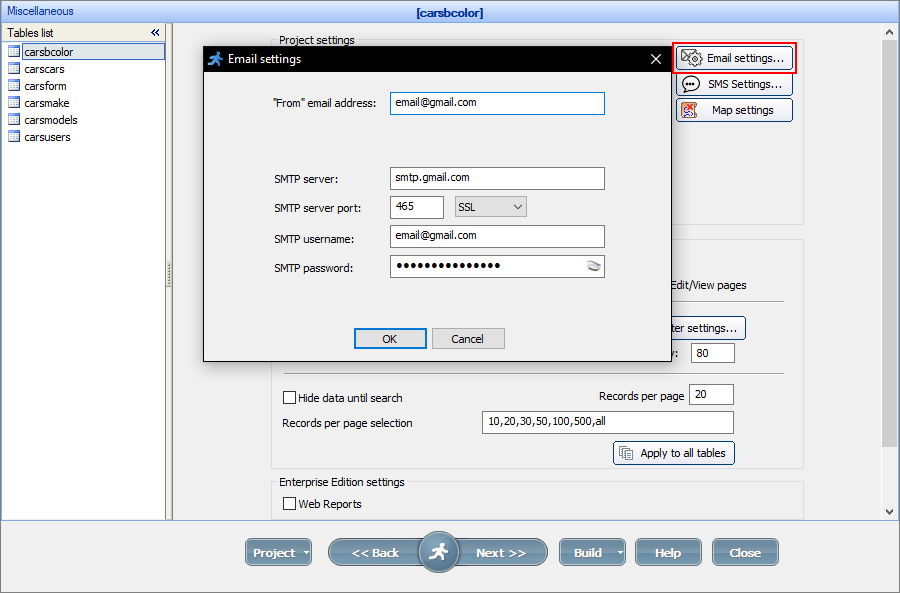
To send emails via Gmail, use the following settings:
•SMTP server: smtp.gmail.com
•SMTP server port: 465
•Secure connection: SSL
•SMTP username: <your gmail address>
•SMTP password: <Gmail password>
A few more Gmail-specific notes:
•Logon to your Gmail account at least once before using Gmail's SMTP settings in your project
•Turn off two-factor authentication
•Allow "Less secure apps" in Gmail account settings
Note: SMTP server, SMTP server port, as well as Secure connection (SSL) settings, may differ from the ones stated in the example. Contact your Mail Service Provider to get the necessary information.
The SMS Settings option lets you use your Twilio account to send the SMS to users. SMS are required to set up the Two-factor authentication.
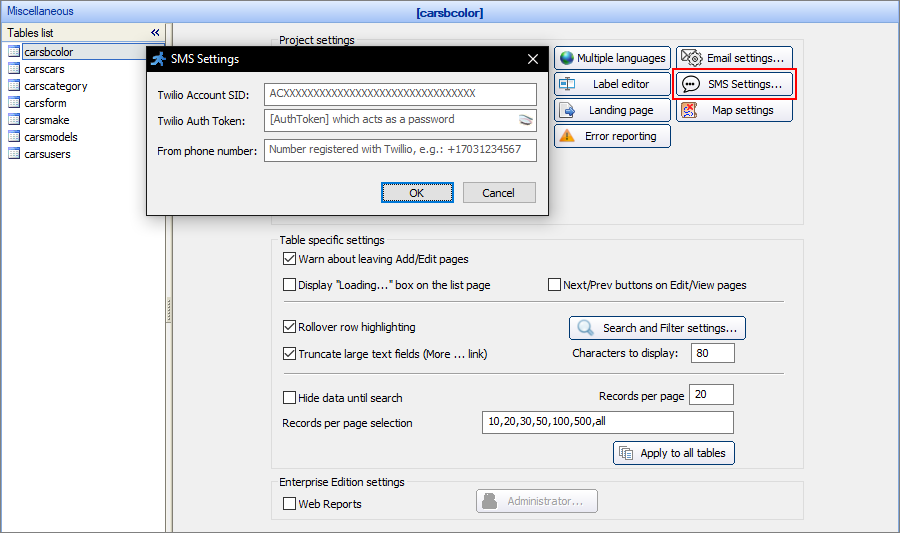
Note: Twilio is not free. Their rates depend on the number of messages you send among many other things.
ASPRunner.NET supports several SMS providers, you can choose the most suitable one.
List of the providers:
•twilio.com (default)
Here is a step-by-step instruction on how to use these providers:
1) Proceed to the "smsapi" folder. You can find it in your installation folder (\source\include\smsapi).
2) Copy an SMS provider file, e.g., "messagebird.cs", from that folder and replace the existing sms.cs file with it. The path to the SMS file is source\include\sms.cs.
3) Create an account on the website of the chosen provider.
4) Insert your credentials into the new SMS provider file.
After you do these steps, the messages will go through the selected SMS provider. It is used in the Two-factor authentication mechanism, and also, each time the Runner_sms function function is invoked.
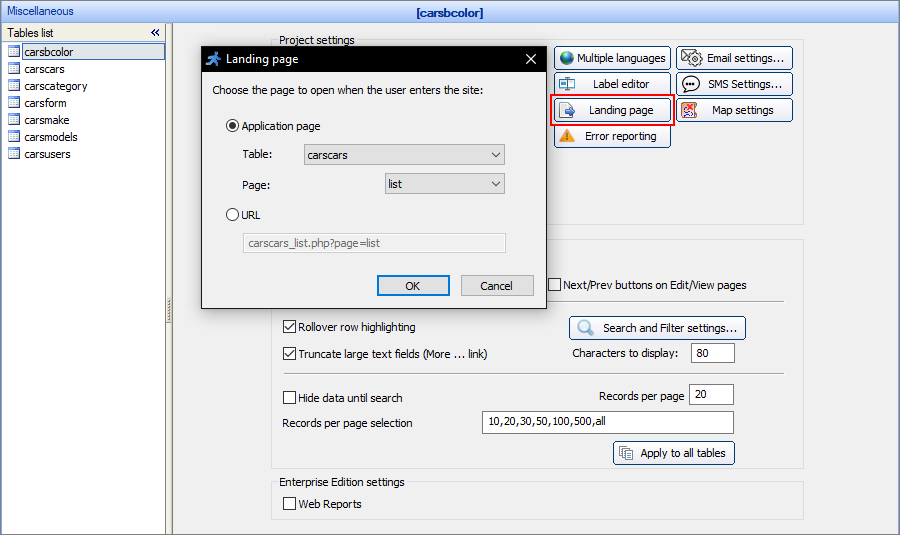
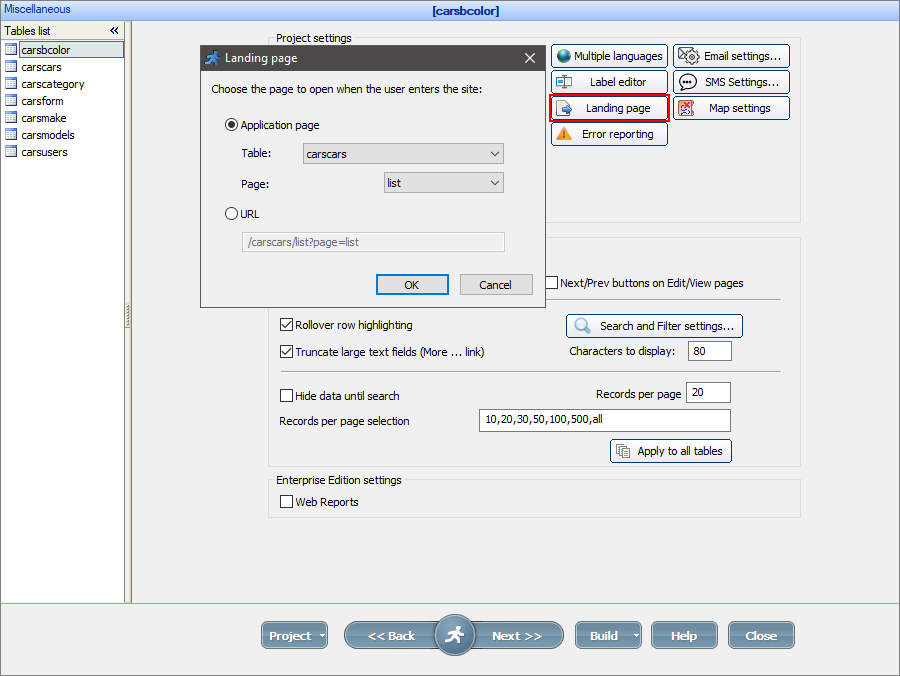
Select the application page to open after the Login page, or when the user enters the site, if the login is disabled or a guest user login is enabled. Alternatively, you can enter a custom URL, for example, a URL with search options carscars/list?qs=audi
Select the map provider and enter the API Key (if required). You can get Bing maps API key for development purposes for free at bingmapsportal.com.
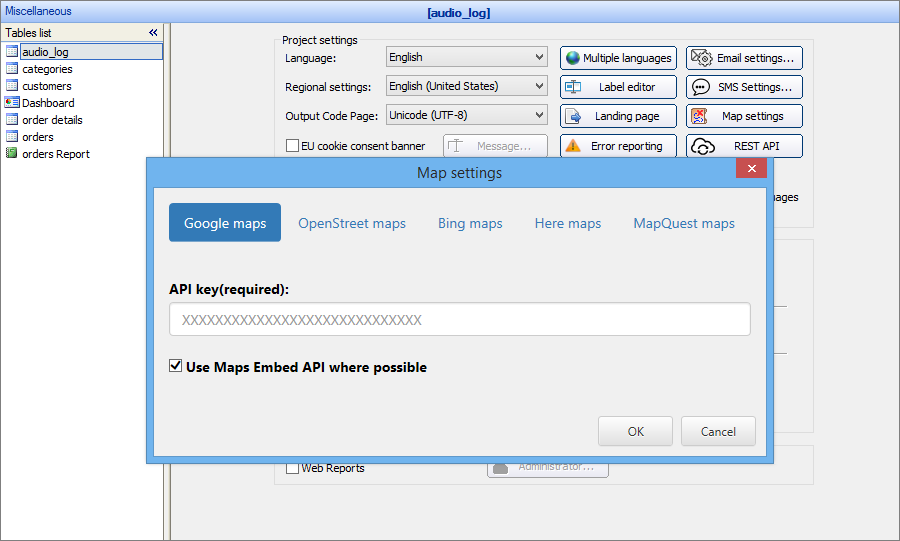
To learn more about inserting maps and working with them, see Insert Map. Most mapping providers require you to specify an API key for the mapping functionality to work. Here is the link that explains how to create an API key for Google Maps. Other mapping providers have a similar option in the control panel.
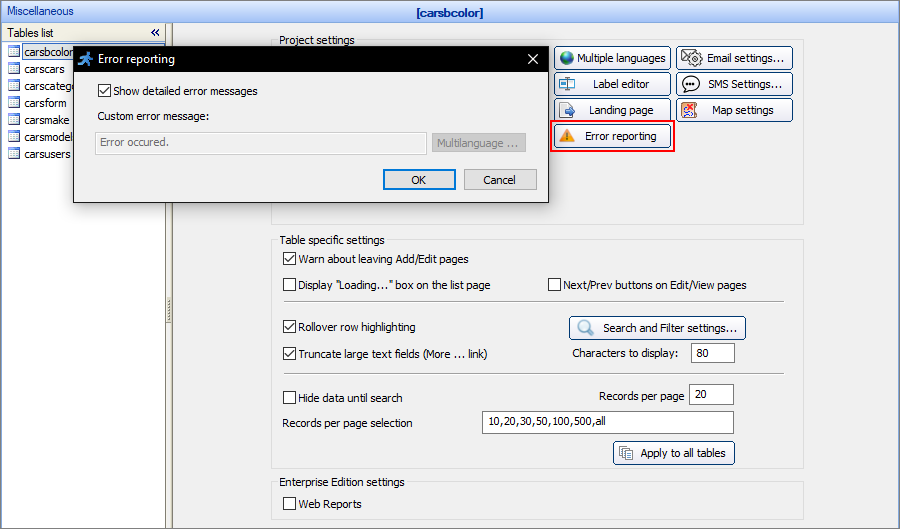
You can select Show detailed error messages to display detailed error messages or deselect it and type in the custom error message. You can also translate the custom error message into all of the languages of the project.
Add Chinese, Japanese, and Korean language support to PDF
Select this checkbox if you have selected any of the languages above as project languages and you use PDF-related options in your project.
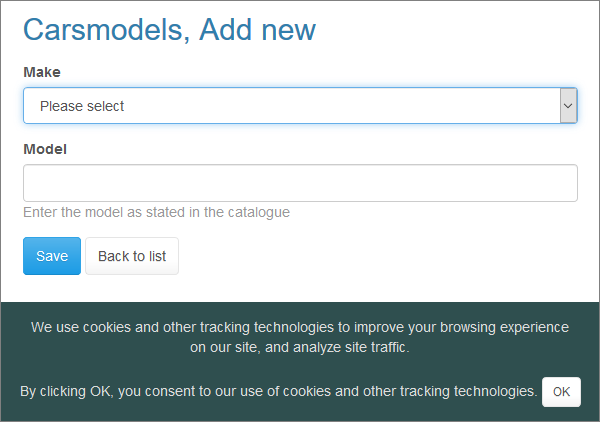
Select the EU cookie consent banner checkbox to enable the customizable banner which appears at the bottom of the page. To edit the text, click the Message button, and enter the text into the EU cookie banner tab of the Label Editor.
Here is how the banner looks like in the browser:
Select this checkbox to make the project accessible to a wide range of people with disabilities. For more information, visit http://www.section508.gov/.
Additionally, there are keyboard hotkeys available as described below:
•ALT+E - inline edit current record;
•ALT+S - save current record;
•ALT+C - cancel inline edit;
•ALT+F - go to the advanced search;
•ALT+M - jump to the menu;
•CTRL+left arrow - previous page;
•CTRL+right arrow - next page.
You can also use the keyboard to navigate through the table links on the List page. Press Arrow Up, Arrow Down, Tab, Shift+Tab to switch between the elements.
When using special internet browser readers, the hotkeys reference link becomes available.
The Table specific settings are miscellaneous settings that can vary from table to table. Use the Tables list on the left-side panel to switch between tables.
Warn about leaving Add/Edit pages
This checkbox allows displaying a warning message upon leaving the Add/Edit pages with unsaved changes.
If you need to skip this warning programmatically add the following code to one of Javascript events:
pageObj.setPageModified(false);
Display "Loading..." box on the list page
This checkbox allows displaying a loading icon until the page loads completely. Use this option if you have large size images or other elements on the page.
Next/Prev buttons on Edit/View pages
This checkbox allows displaying the Next/Prev buttons on the Edit/View pages. These buttons allow switching between records without going back to the List page.
Note: for this option to work correctly, you must choose the key field for the selected table on the Choose pages screen.
Rollover row highlighting
Select this checkbox to turn on the row highlighting feature. This feature makes the mouse pointer highlight the table row on the list page.
Search and Filter settings
This button adjusting the search and filter settings. For more information, see Choose fields: Search and Filter settings.
Hide data until search
This option hides all of the records on the page and displays a message: "Nothing to see. Run some search". The user needs to run a search to display the results.
Records per page
This option sets the initial number of records to be displayed when the users load the page for the first time. If you need to show all the records initially, enter a larger enough number there like 9999.
Records per page selection
This field defines what options to show in pagination control. Type in all to enable the option to show all records.
Apply to all tables
This button applies the current Hide data until search, Records per page, and Records per page selection settings to every table in the project.
These settings are available only in the Enterprise Edition of ASPRunner.NET.
Web reports
Select the Web reports checkbox to enable the online report/chart builder. Click the Administrator button to specify the password to access the Web Reports and Charts admin area.
See also:
•Localizing ASPRunner.NET applications
•A complete guide to sending emails with a web based application