PHPRunner comes with a built-in web server. However, you may want to install your web server. This page explains how to install a local web server (XAMPP) and configure PHPRunner to use it.
XAMPP is a free package that includes an easy-to-setup web server (Apache), database server (MySQL), and a server-side scripting language (PHP). More about XAMPP.
This guide uses Windows 10 64-bit and XAMPP v7.3.5.
Download XAMPP
•Visit https://www.apachefriends.org/download.html.
•Download XAMPP Installer for Windows.
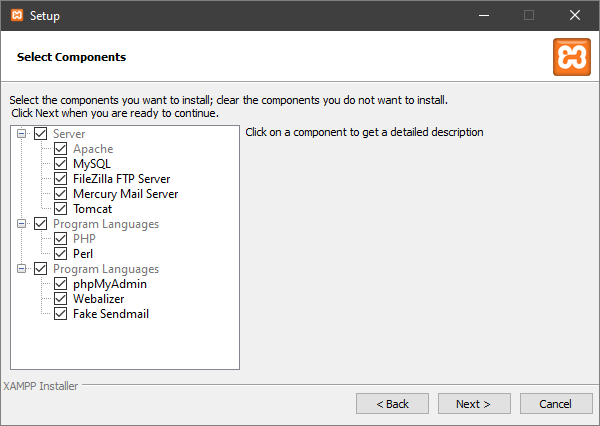
Install XAMPP
1. Run the installer.
2. You can select to install Apache and MySQL as services, which makes them start automatically every time you start Windows. That allows other applications you may have, such as an IIS server, to run simultaneously.
If you don't choose this option, you need to use the XAMPP Control Panel application to start the servers individually each time you need them. This may be desirable if you don't intend to use your servers that often.
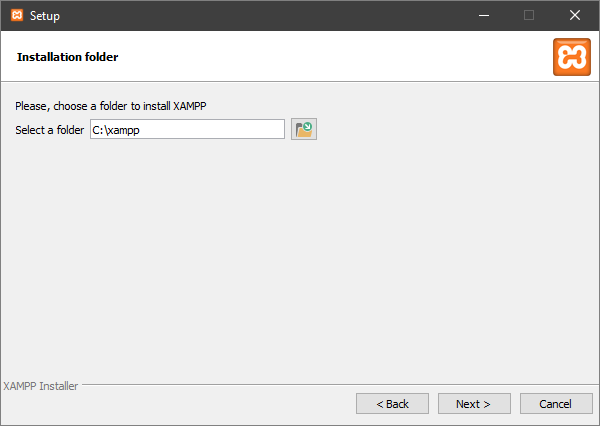
3. Choose a destination to install XAMPP.
Note: if the User Account Control (UAC) is turned on in the OS, Apache doesn't recommend installing XAMPP into the C:\Program Files\ folder.
4. XAMPP installation starts. After it is complete, click Finish.
5. Next, you are prompted to start the XAMPP Control Panel, which can also be opened by selecting Start » All Programs » XAMPP » XAMPP Control Panel, or by running C:\xampp\xampp-control.exe. This tool lets you start and stop the various servers installed as part of XAMPP. If Apache and MySQL were installed as services, select No. Otherwise - run the XAMPP Control Panel.
Using XAMPP
The XAMPP Control Panel is used to control and monitor the status of services that XAMPP has installed. It is recommended to tun it as Administrator.
When the control panel is running, the following icon is visible in your system tray ![]() . Double-clicking this icon brings up the Control Panel.
. Double-clicking this icon brings up the Control Panel.
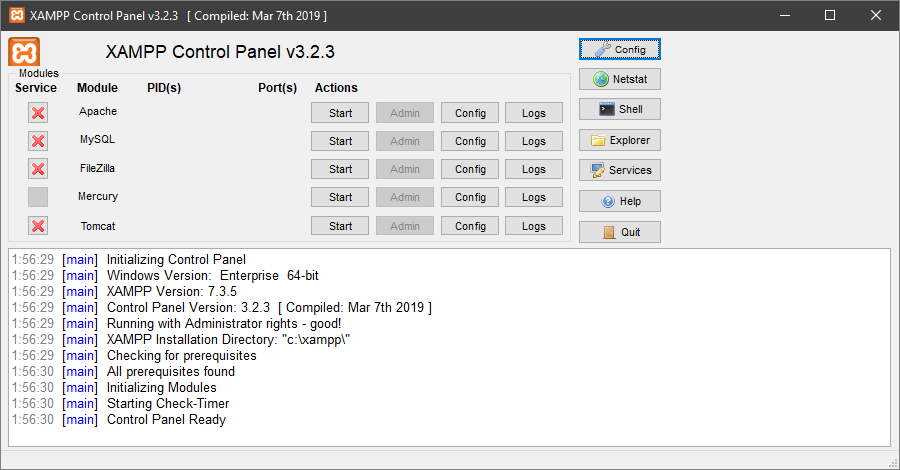
If you see a red X under Service - that means the module is not installed as a service. In that case, you need to start and stop them manually. Click Start to run the modules.
Go to http://localhost/ in the browser. If you are directed to a page with the XAMPP logo, your installation was successful.
You can add or edit the files in C:\xampp\htdocs to change what you see at http://localhost/. Right after installation, this folder contains all the files for the XAMPP welcome web page. You can remove or back up these files so that they do not conflict in any way.
The XAMPP configuration interface is available at http://localhost/xampp/index.php and is located at C:\xampp\htdocs\xampp.
Note: To send emails via PHP, you need to modify the php.ini file. It is stored at C:\xampp\php. Change the line sendmail_from = me@example.com to sendmail_from = your_email_address.
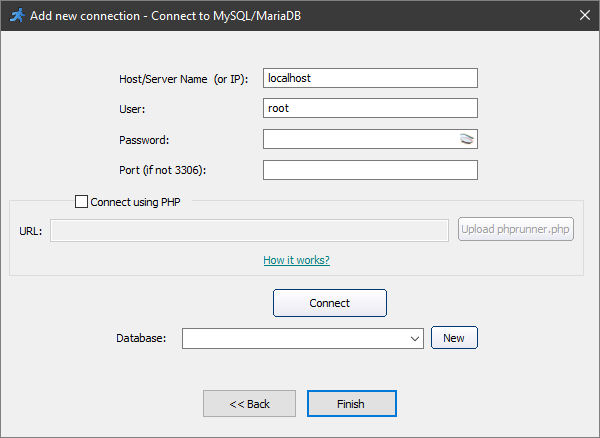
When connecting to MySQL, type localhost in the Host/Server name (or IP) field and root in the User field. Leave the Password field blank.
On the Output directory screen, switch to I have my own web server option and enter the URL manually (i.e., http://localhost/project1). Change the output directory as well to one of web server subdirectories (i.e., C:\xampp\htdocs\project1).
See also:
•Desktop applications with PHPRunner