Quick jump |
|
|
|
Click the Project button and select one of the options from the dropdown list to create a new project, open or save an existing one, or configure the settings of a project.

To create a new project, you need to proceed to the starting screen of the software. If you are are working with the existing project, save it and then click 'Close' but to get to the starting screen.
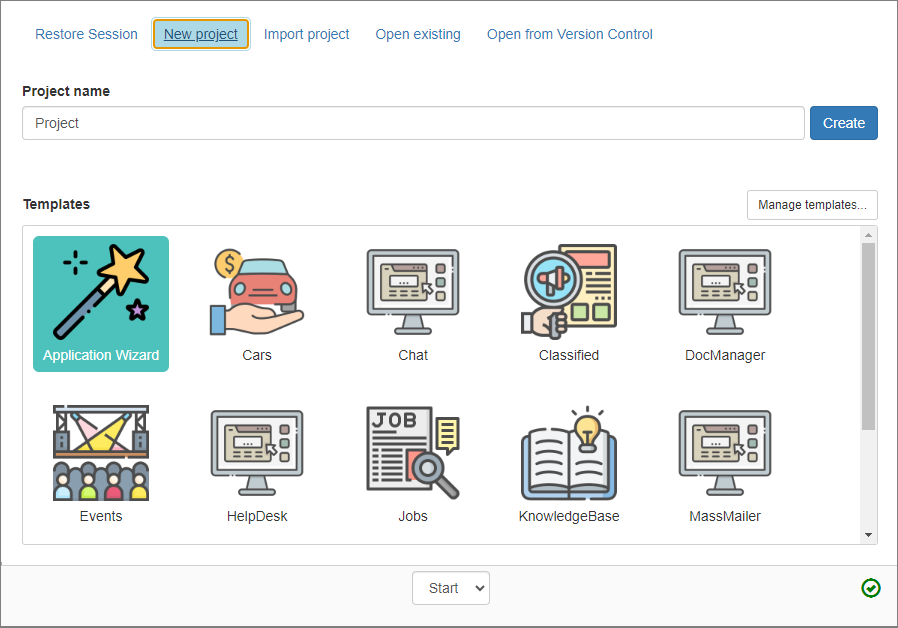
•Create a new project from scratch by selecting Blank application.
•Create a project from the template.
Enter/change project name and click 'Create'.
For more information about business templates, see About templates.
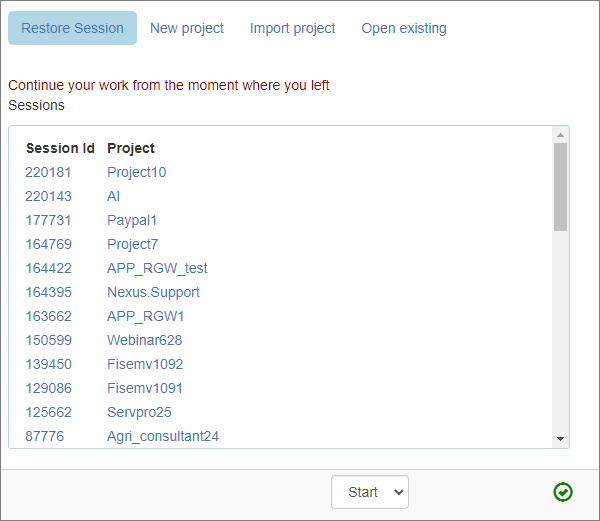
If you were working on the project and did save it, PHPRunner saves a temporary copy of the project for you called "session". You can select a session a continue your work from the moment where you left it. Once you restored a session and saved it, it will disappear from the list of sessions.
Open project from Version Control
PHPRunner supports SVN and git source control systems. To open a project from version control proceed to 'Open from Version Control' tab, click 'Browse' and point PHPRunner to the folder where checkout from source control was performed. Check SVN/git support article for complete instructions.
Starting with version 11, all projects are stored in the database. Read more about Projects Database.
To open an existing project, proceed to Open existing tab and select the project you want to open.
If you want to save the current project under a different name - for development purposes or to create a backup - select the Save Project As option. This action creates a new project in the project database.
Saving your project as a Template
You can save your project as a template and then use it the same way you use other templates. In this case, your database, the project file, events code, and all the visual modifications made in Page Designer will be saved as a part of the template.
Note: the Save Project As Template option is available only for the MySQL, SQL Server, and MS Access projects.
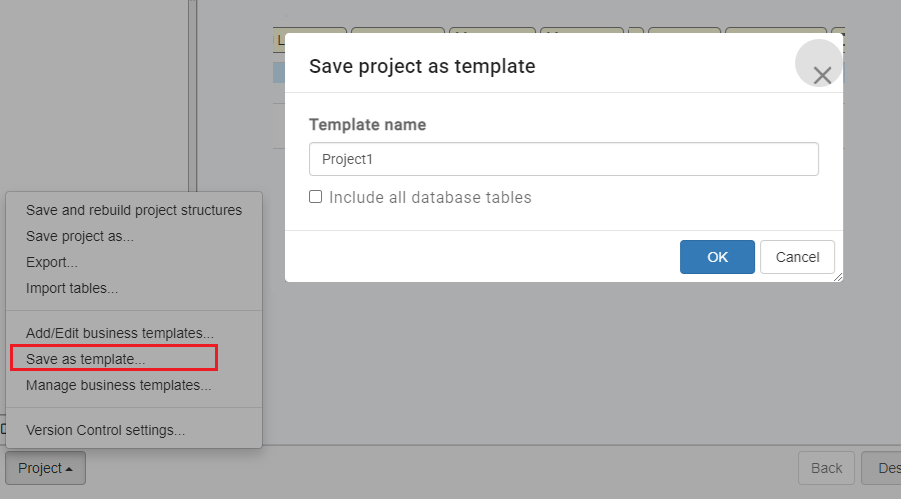
When saving the project as a template, you need to type in the template name. The new template becomes available on the list of templates when you create a new project.
Add template to existing project
You can create a new project using two templates or add a template to an existing project. To avoid rewriting the template tables over the existing ones, all PHPRunner business template tables and files have a prefix. For instance, Cars template tables will be named carscars, carsmake, carscategory etc.
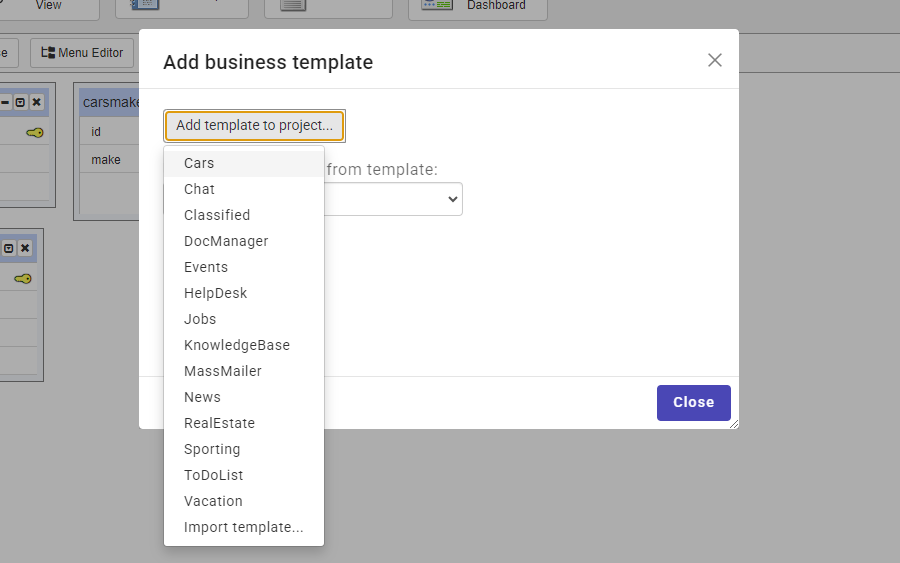
If you have added multiple templates to the project, you can choose one to inherit the security settings from in the Security template dropdown box.
If you add more than one template to the project, it is not guaranteed to run smoothly right out of the box and some additional configuration might be required. This is what you need to do to add two or more templates to the same project:
•Create a temporary project using the second template
•Proceed to the AfterAppInit event and copy the code there. Close the temporary project without saving.
•Open your original project and paste this code to the end of AfterAppInit event.
Export your project into a single .zip archive with the Export project option. This action exports the essentials like the project name, its settings, dashboards/charts/reports, and events.
You can also export the project database structure, as well as extra data like the images, styles, and layouts.
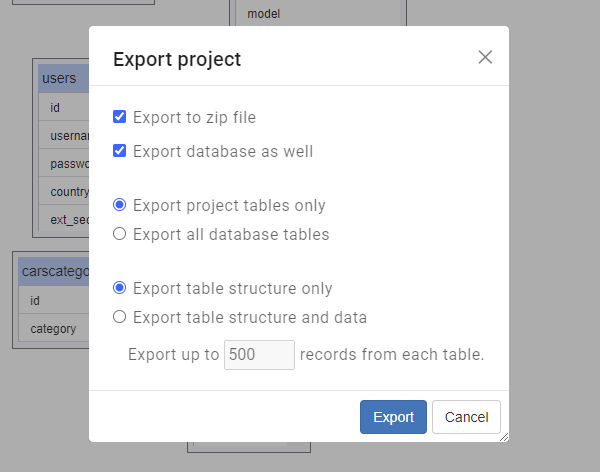
The exported project is saved to the C:\runnerapps folder. The file name is generated using a template: %project_name%yyyymmdd_hhmmss.zip.
See also: