Quick jump |
Web.config is an ASP.NET application configuration file, that is written in XML. It stays in the root directory of the application and is responsible for controlling the application’s behavior.
This file configures application security, SQL Database connection, session types and duration, the modules in the HTTP pipeline, HTTP handlers, WCF services interoperability, and many customizations in the application context.
The Web.config file must be a well-formed XML document. At a minimum, the Web.config file must have the <configuration> element and the <system.web> element. These elements usually contain individual configuration elements.
The following example shows a minimal Web.config file:
<?xml version="1.0"?>
<configuration>
<system.web>
</system.web>
</configuration>
The first line of the Web.config file describes the document as XML-formatted and specifies the character encoding type. This first line must be the same for all .config files.
The lines that follow mark the beginning and the end of the <configuration> element and the <system.web> element of the Web.config file. By themselves, these lines do nothing. However, the lines provide a structure that permits you to add future configuration settings.
You add the majority of the ASP.NET configuration settings between the <system.web> and </system.web> lines. These lines mark the beginning and the end of the ASP.NET configuration settings.
ASP.NET relies on .config files to define configuration options. The .config files are text-based XML files. Multiple .config files can exist on a single system.
System-wide configuration settings for the .NET Framework are defined in the Machine.config file. The Machine.config file is located in the %SystemRoot%\Microsoft.NET\Framework\%VersionNumber%\CONFIG\ folder. The default settings that are contained in the Machine.config file can be modified to affect the behavior of .NET applications on the whole system.
You can change the ASP.NET configuration settings for a single application if you create a Web.config file in the root folder of the application. When you do this, the settings in the Web.config file override the settings in the Machine.config file.
Creating and editing a Web.config file
Typically, you would create and edit a Web.config file by using a text editor such as Notepad in the root directory of your ASP.NET application.
Web.config file is created automatically. It can be accessed and edited directly in the Editor screen.
Proceed to the Editor screen -> Templates -> Web.config to view the file.
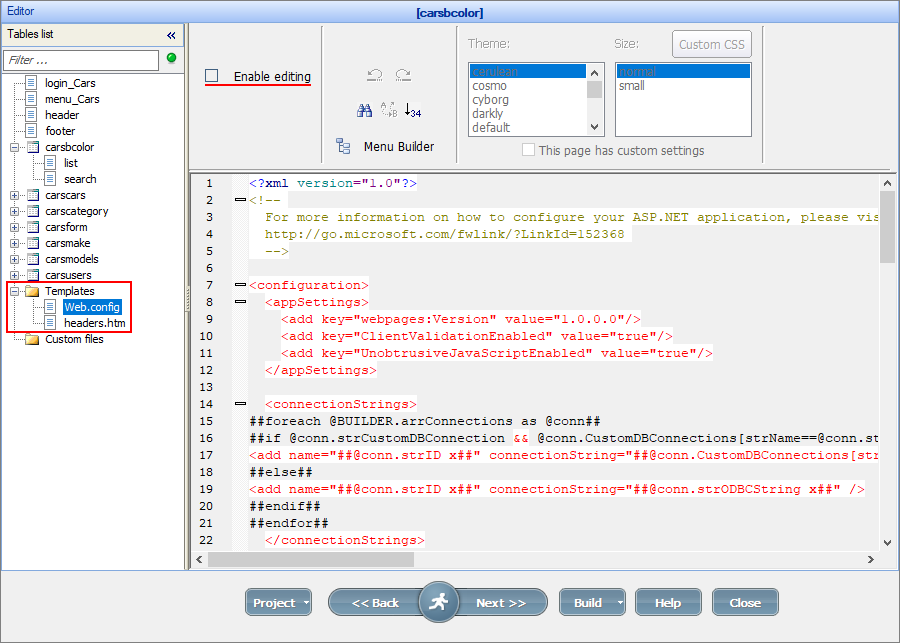
To edit the Web.config file, click the Enable editing checkbox.
The Web.config file has many different options. If you want, for example, to allow uploading files up to 1GB, you need to add the following line to the web.config file above </system.web>:
<httpRuntime maxRequestLength="1000000" />
Here is how a full Web.config file may look like:
<?xml version="1.0"?>
<!--
For more information on how to configure your ASP.NET application, please visit
http://go.microsoft.com/fwlink/?LinkId=152368
-->
<configuration>
<appSettings>
<add key="webpages:Version" value="1.0.0.0"/>
<add key="ClientValidationEnabled" value="true"/>
<add key="UnobtrusiveJavaScriptEnabled" value="true"/>
</appSettings>
<connectionStrings>
##foreach @BUILDER.arrConnections as @conn##
##if @conn.strCustomDBConnection && @conn.CustomDBConnections[strName==@conn.strCustomDBConnection].len##
<add name="##@conn.strID x##" connectionString="##@conn.CustomDBConnections[strName==@conn.strCustomDBConnection].strCode x##" />
##else##
<add name="##@conn.strID x##" connectionString="##@conn.strODBCString x##" />
##endif##
##endfor##
</connectionStrings>
<system.web>
<!-- FOR DEBUGGING PURPOSES
<healthMonitoring enabled="true" heartbeatInterval="1">
<rules>
<add name="HeartBeat" eventName="Heartbeats" provider="EventLogProvider" profile="Default" minInstances="1" minInterval="00:01:00" maxLimit="Infinite"/>
<add name="App Lifetime" eventName="Application Lifetime Events" provider="EventLogProvider" profile="Default" minInstances="1" minInterval="00:00:00" maxLimit="Infinite"/>
</rules>
</healthMonitoring>
-->
<customErrors mode="Off" />
<compilation debug="true" targetFramework="4.0">
<assemblies>
<add assembly="System.Web.Abstractions, Version=4.0.0.0, Culture=neutral, PublicKeyToken=31BF3856AD364E35" />
<add assembly="System.Web.Helpers, Version=1.0.0.0, Culture=neutral, PublicKeyToken=31BF3856AD364E35" />
<add assembly="System.Web.Routing, Version=4.0.0.0, Culture=neutral, PublicKeyToken=31BF3856AD364E35" />
<add assembly="System.Web.Mvc, Version=3.0.0.0, Culture=neutral, PublicKeyToken=31BF3856AD364E35" />
<add assembly="System.Web.WebPages, Version=1.0.0.0, Culture=neutral, PublicKeyToken=31BF3856AD364E35" />
</assemblies>
</compilation>
##if @BUILDER.nLoginMethod==LOGIN_AD && @BUILDER.m_ADSingleSignOn##
<authentication mode="Windows" />
##else##
<authentication mode="None" />
##endif##
<membership>
<providers>
<clear/>
<add name="AspNetSqlMembershipProvider" type="System.Web.Security.SqlMembershipProvider" connectionStringName="ApplicationServices"
enablePasswordRetrieval="false" enablePasswordReset="true" requiresQuestionAndAnswer="false" requiresUniqueEmail="false"
maxInvalidPasswordAttempts="5" minRequiredPasswordLength="6" minRequiredNonalphanumericCharacters="0" passwordAttemptWindow="10"
applicationName="/" />
</providers>
</membership>
<profile>
<providers>
<clear/>
<add name="AspNetSqlProfileProvider" type="System.Web.Profile.SqlProfileProvider" connectionStringName="ApplicationServices" applicationName="/" />
</providers>
</profile>
<roleManager enabled="false">
<providers>
<clear/>
<add name="AspNetSqlRoleProvider" type="System.Web.Security.SqlRoleProvider" connectionStringName="ApplicationServices" applicationName="/" />
<add name="AspNetWindowsTokenRoleProvider" type="System.Web.Security.WindowsTokenRoleProvider" applicationName="/" />
</providers>
</roleManager>
<pages validateRequest="false">
<namespaces>
<add namespace="System.Web.Helpers" />
<add namespace="System.Web.Mvc" />
<add namespace="System.Web.Mvc.Ajax" />
<add namespace="System.Web.Mvc.Html" />
<add namespace="System.Web.Routing" />
<add namespace="System.Web.WebPages"/>
</namespaces>
</pages>
<globalization fileEncoding="##@BUILDER.strCharset s##" responseEncoding="##@BUILDER.strCharset s##" requestEncoding="##@BUILDER.strCharset s##" />
<httpRuntime maxRequestLength="1000000" />
</system.web>
<system.webServer>
<validation validateIntegratedModeConfiguration="false"/>
<modules runAllManagedModulesForAllRequests="true"/>
</system.webServer>
<runtime>
<assemblyBinding xmlns="urn:schemas-microsoft-com:asm.v1">
<dependentAssembly>
<assemblyIdentity name="System.Web.Mvc" publicKeyToken="31bf3856ad364e35" />
<bindingRedirect oldVersion="1.0.0.0-2.0.0.0" newVersion="3.0.0.0" />
</dependentAssembly>
</assemblyBinding>
</runtime>
</configuration>
You can learn more about configuring your ASP.NET application by visiting http://go.microsoft.com/fwlink/?LinkId=152368.
See also